How to Purchase Hosting and SSL with Namecheap


Need help? Book a call to complete these steps with our support team.
If your domain is hosted on another server, update the nameservers in your DNS settings to:
dns1.namecheaphosting.com
dns2.namecheaphosting.com
Allow a few hours for the changes to propagate, then proceed with the following steps.

An agency owner reached out to us last year with a question we hear constantly. He was paying $1,240 per month for HubSpot. He was considering switching to GoHighLevel. His first question was “will it do everything HubSpot does?” His second was “will my team riot if I make them switch?” Both were the wrong…
Introduction Welcome to Pzmeer.com, your go-to source for insightful content on cutting-edge business tools. In this article, we dive deep into Sales Navigator, a tool that promises to revolutionize your sales strategy. Join us on a journey through the exclusive features, benefits, and user experiences that make Sales Navigator a game-changer for businesses worldwide. Start…

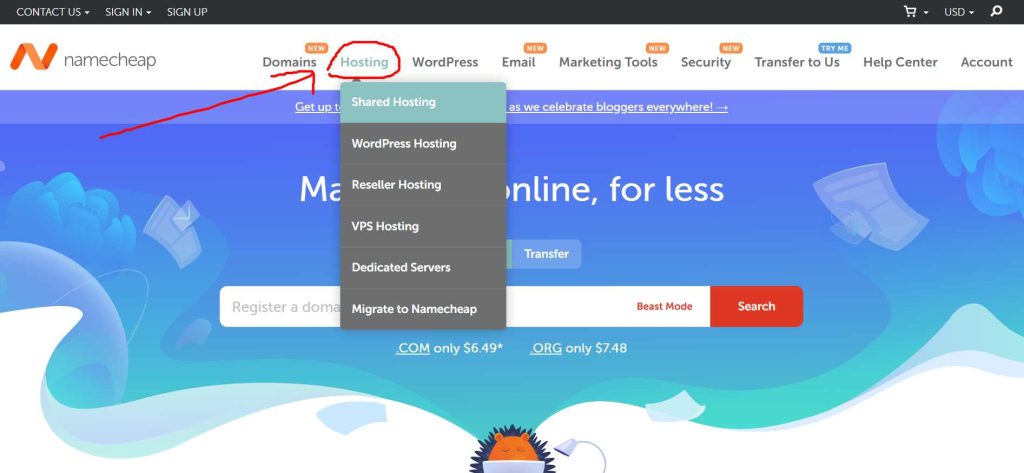
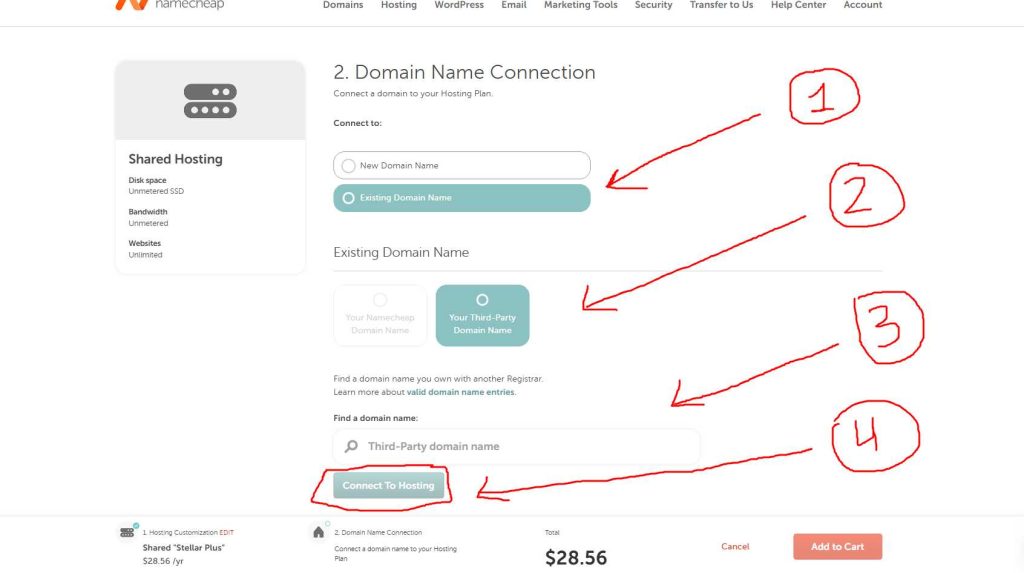
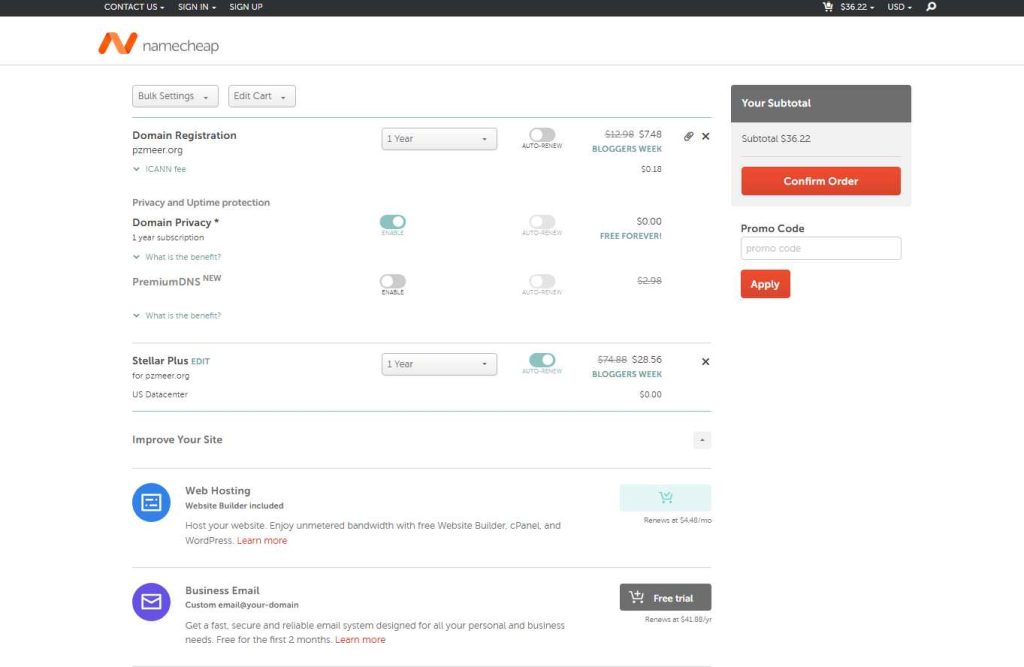
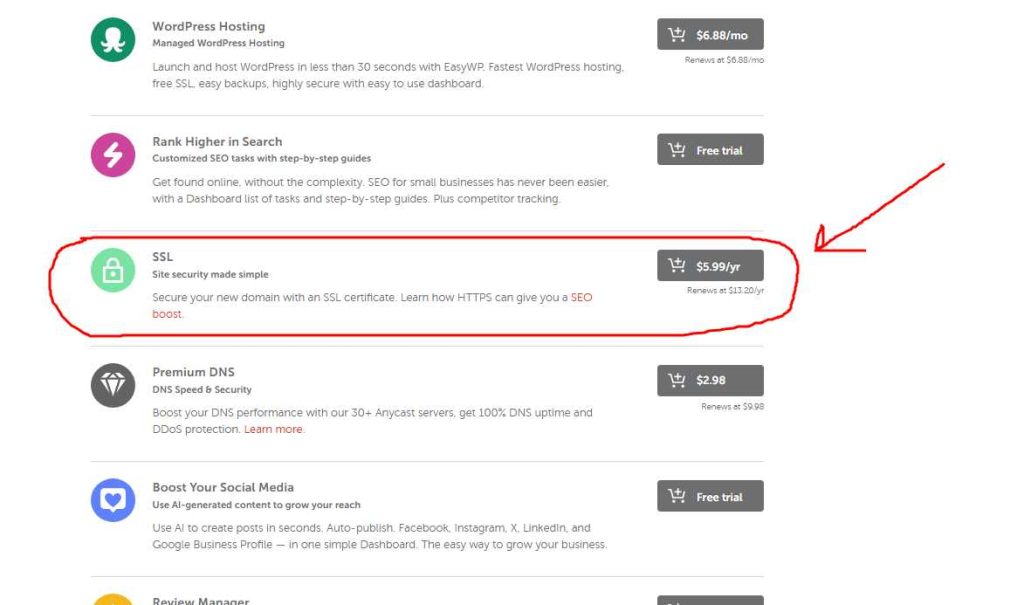
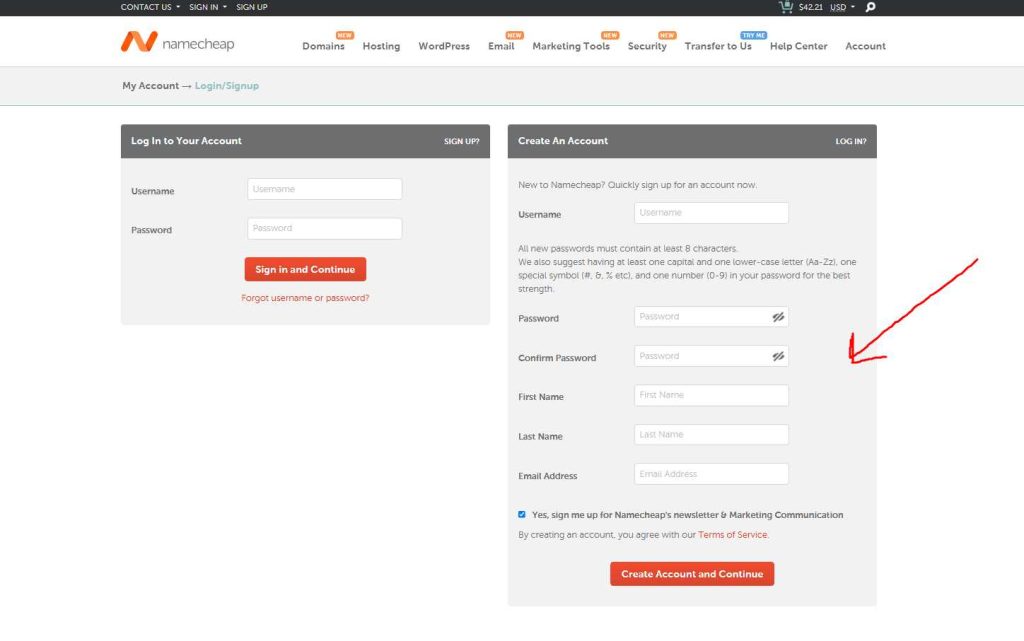
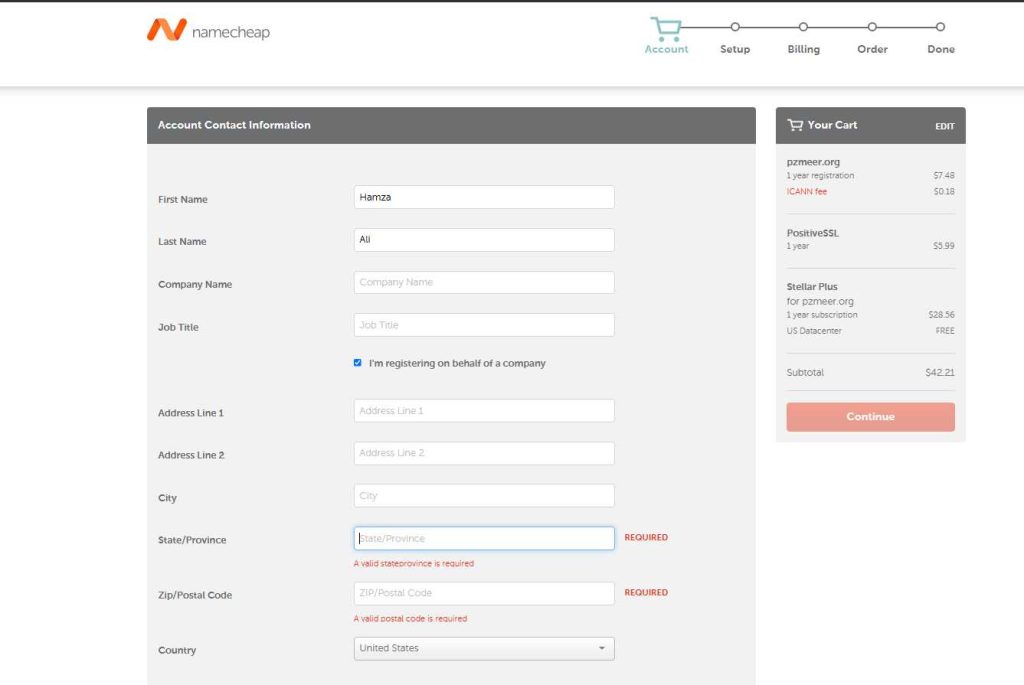
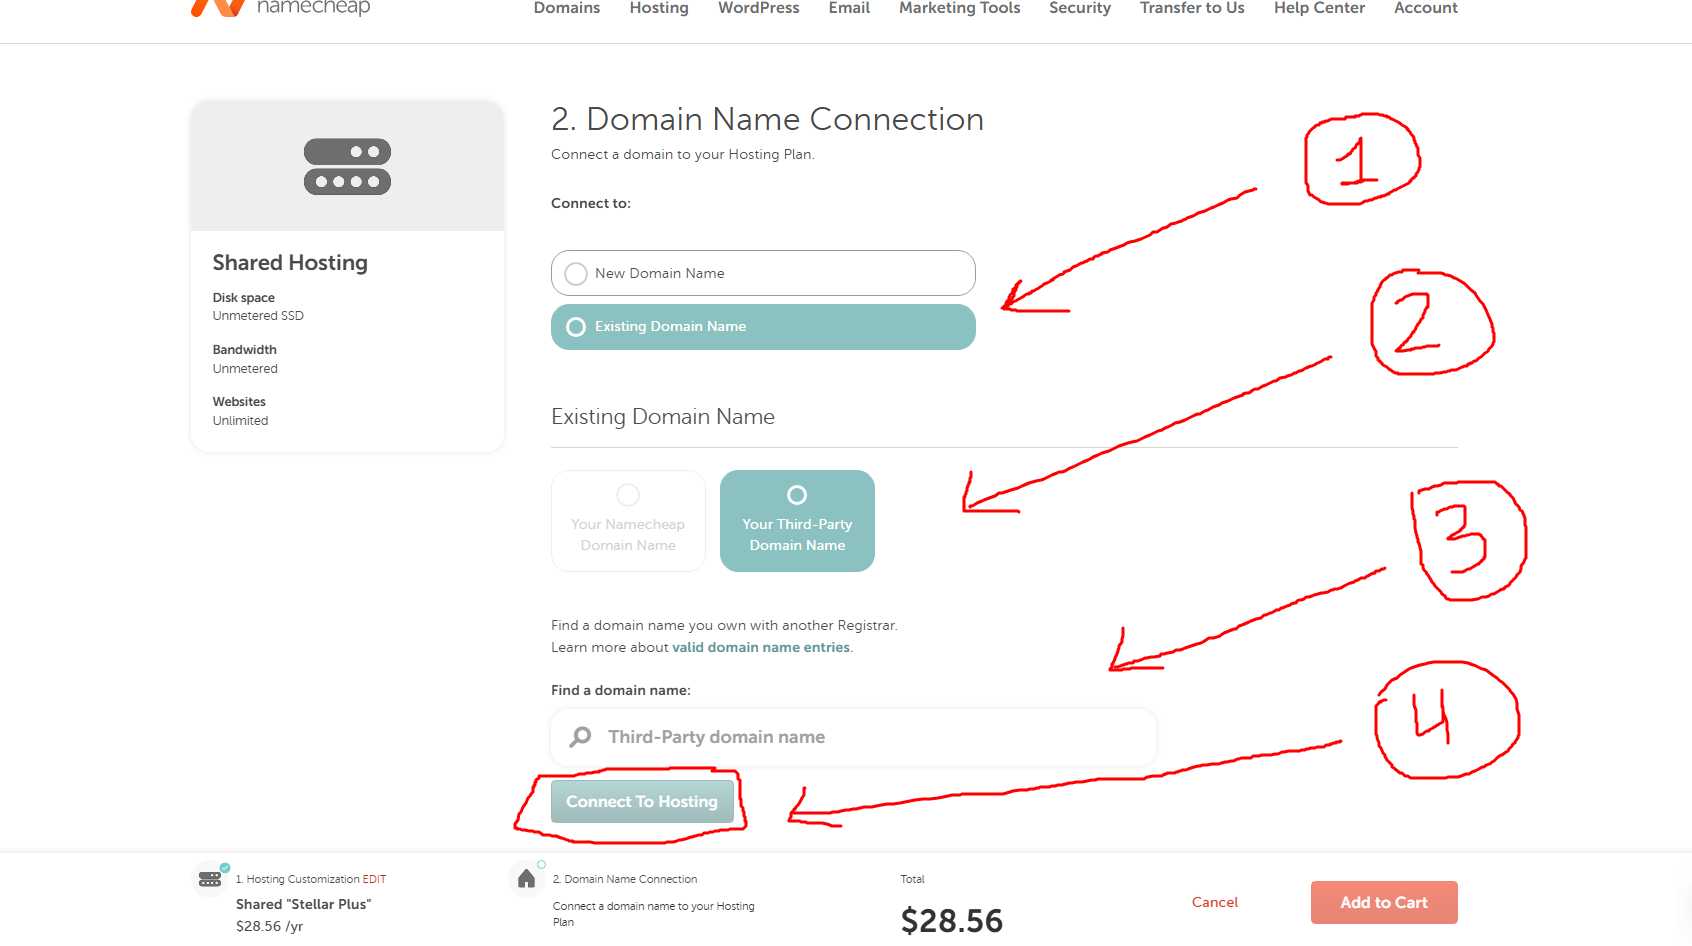
Need help? Book a call to complete these steps with our support team. Book a call Step 1: Visit https://www.namecheap.com/ and choose Shared Hosting under the Hosting menu Step 2: Choose the Stellar Plus plan and click ‘Get Started’ to proceed. Step 3: Select ‘New Domain Name’ and ‘New Purchase’, enter your desired domain name,…

Every single home buyer who closed on a house last year started their search online. Not most of them. Not a large majority. One hundred percent of them, according to the NAR 2025 Profile of Home Buyers and Sellers. And 43% say their very first step was to search for properties online — before they…

When a homeowner’s air conditioning fails in July — or their heat goes out in January — they grab their phone and search. They are not browsing. They are not comparing options at leisure. They need someone now, and the first company that shows up, looks credible, and makes it easy to call or book…
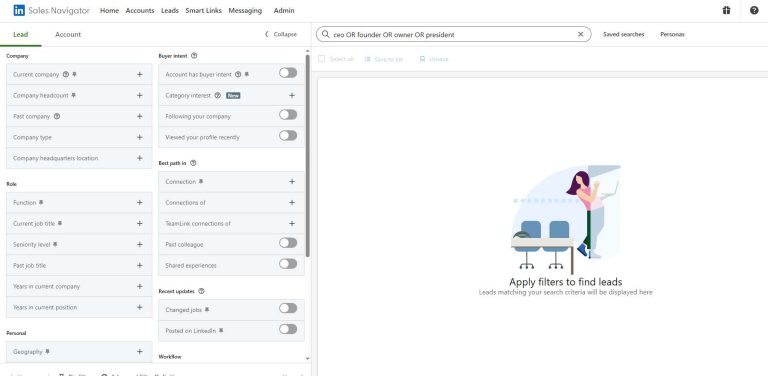
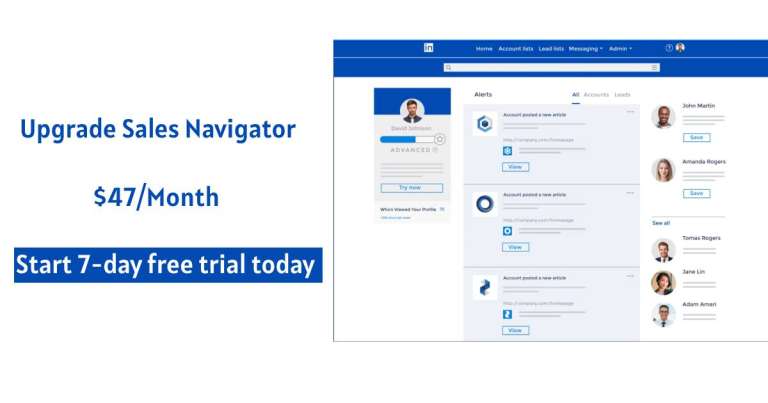
LinkedIn Sales Navigator is more than a premium upgrade—it’s a precision tool for B2B sales professionals, founders, and outreach specialists. This guide walks you through its core features, setup, and strategic use to help you generate leads, build relationships, and close deals faster. What Is LinkedIn Sales Navigator? Sales Navigator is LinkedIn’s advanced prospecting platform,…